

TeleToyland Sandbox How It Works: Step 2
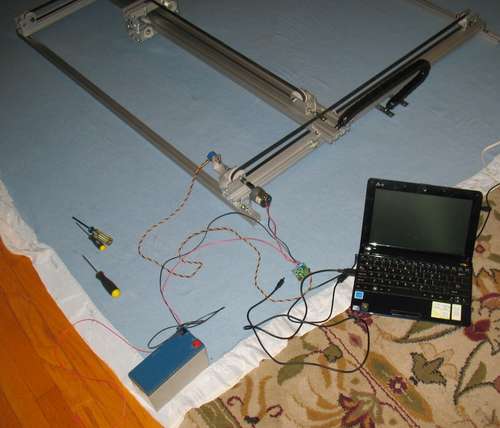
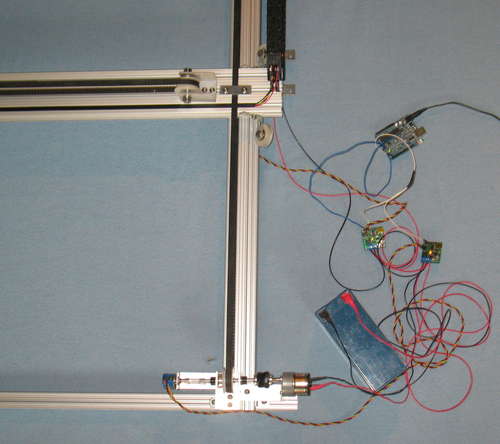
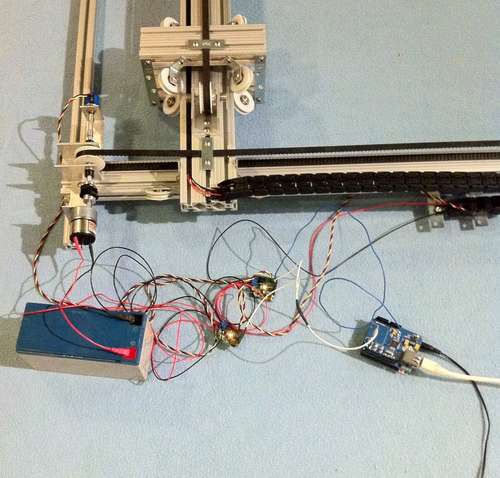
Step 9: Electronics and Control
Motor Driver TuningWe used the Pololu Jrk 21v3 USB Motor Controller with Feedback (JRK) - these controllers work like the electronics in a hobby servo, but have a lot more control - you can set the PID parameters, motor direction, range etc. via a Windows program and the USB connector, and they have several input methods for control (R/C signals, serial), and feedback (we used the linear voltage - potentiometer). For the original sandbox, we are now using one of these for the X axis, and still using a modified (for continuous rotation) high-speed, high-power servo for the Y axis (which needs less power to move).
With the JRK controllers, the PID algorithm can be tuned pretty tight so we are close, but not as precise as some CNC setups. But, it's way more than we needed for our application. For the 200 RPM motors we used on the X axis, we ended up with P=3.5, I=0, and D=20. We are not experts at this, and maybe they can be tuned better. We are using the auto scaling of the input - the training mode to make the range of movement map to the full 0-4095 range. This will make the control program easier to setup since it will not need any calibration or range constants other than 0 and 4095 - something we did not have with the previous project's servo motors.
Programming the Controller and Ethernet Connection
There are many options to set this up for Internet control. For the previous project, we used a Siteplayer Telnet Ethernet to serial module plugged directly in to a Lynxmotion SSC-32 servo controller, and the servo or JRK controller plugs into the SSC using the R/C command mode. This is a good setup for web server control since it needs only telnet commands (easy in PHP) to control it as long as the web server buffers and sends the commands nicely. The Lynxmotion SSC-32 also allows the commands to be run over a set time period (a couple seconds typically), so oblique moves work well with the timing - the shorter distance axis moving more slowly.
For this project, we decided to use an Arduino to run the JRK controllers. So, we need to time the position commands to make the X and Y axes move together evenly. We could also have used the Arduino to drive a Lynxmotion SSC-32, but since the JRKs also take serial commands directly, it seems cleaner to have one less set of boards.
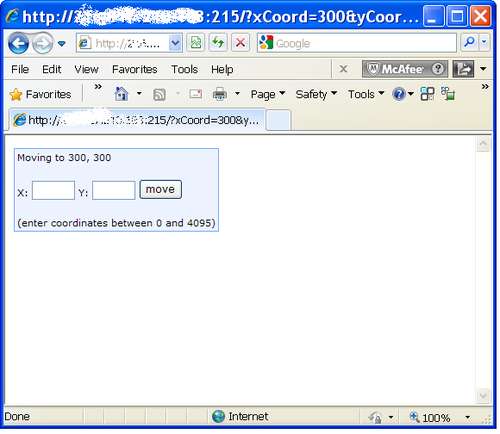
Here is the Arduino Sketch we used to test moving the XY Table to random positions. It shows how to do the timing loop for the JRK controllers, so the diagonal moves will be straight. This code uses the clock to time the position at each loop. By not using delays, we are allowing for the next step of adding the Ethernet Shield and running the Arduino as a web server too.
As before, we could use an Ethernet to Serial device like the Siteplayer Telnet to send commands to the Arduino, but we can also use an Ethernet Shield to run the Arduino. The pictures show that setup and the simple web UI we used for testing. There are no PCs or web servers - the entire web server is on the Arduino + Ethernet Shield! The sketch for that setup is here. You will need to put in your own IP address, and we had a port forwarding setup on our firewall to make it work.
That Arduino web UI could be extended to allow multiple commands, save them in an array on the Arduino, and play back the moves in sequence. Once we get this setup for TeleToyland, we will either do that, or continue to use the server to buffer them as before.
That's about it. We hope this inspires you to make your own web connected tele-robots!
Intro | 1 | 2 | 3 | 4 | 5 | 6 | 7 | 8 | 9